Showing posts with label Leah's Kitchen. Show all posts

Monday, 26 January 2015

LEAH's Kitchen: Jemput-jemput Udang (Prawn Fritters)

One day, my mom brought back some #prawnfritters home from her workplace. I didn't expect it to be so addictive, especially when your teeth sinks in into the prawn meat in the fritters itself. Yummy! My husband got so addicted to it that he asked me to learn how to make it. Ok, Mr Husband, you asked for it, so you will get it :)

Jemput-Jemput Udang (Prawn Fritters)
 
Ingredients:
4 cups of flour
2 eggs
1.5 tsp of salt
0.5 tsp of ajinomoto
2 tsp of turmeric powder
1 large onion (blended)
1 cup of spinach (boiled and cut finely)
Handful of parsley (daun sop)
16 pcs fresh prawns (peeled and cut into small pieces)
Chilli padi (chopped finely)
Water

Instructions:
  1. Sift flour into a large mixing bowl. Add eggs, salt, ajinomoto and turmeric powder.
  2. Pouring in water bit by bit into the bowl, start mixing the ingredients inside the bowl till batter is evenly mixed. Batter should not be too thick or too liquid. Add water/flour to adjust texture accordingly (for me, I used a blender at the end to make the batter smoother).
  3. Add onion, spinach, parsley, prawns and chilli padi into the batter. Mix evenly again.
  4. Pour substantial amount of cooking oil into a frying pan to start deep-frying fritters. Using a tablespoon, pour in the mixture one by one to get the fritter's shape desired (Mine looked flat, you can add self-raising flour to give it more shape).
  5. Deep fry fritter till it turn golden brown and crisp. Serve with chilli sauce.

Friday, 16 January 2015

LEAH's Kitchen: Beef Roti John

I was thinking of what to do with my balance minced beef and the thought of my mom's #rotijohn came into my mind. So here it goes...

Beef Roti John
Ingredients:
1 x onion (chopped)
500gm minced beef
3 x French loaf
Pepper
1 tsp of salt
1/2 tsp of ajinomoto
4 x eggs
4 x stalks red chilli (sliced thinly)
A bunch of Daun sop (chopped finely)
 
Instructions:
1. In a mixer bowl, mixed all ingredients except French loaf until the filling is evenly mixed.
2. Cut French loaf into half, then halve it through the centre to spread the filling.
3. Spread generous amount of meat fillings onto the loaf.
4. Heat some oil in a flat pan. With the filling faced down, placed the loaf onto the pan and keep pressing on it to cook the meat. By pressing it constantly, the meat juice will be able to come out of the loaf easily.
5. Turn the loaf upside down and heat bread till crispy.
 
Healthy Rating:
I don't think bread is really healthy unless you go for wholemeal maybe. To enhance the flavour more, add cheese and melt or eat it with chilli sauce.
 

Friday, 10 October 2014

LEAH's Kitchen: Spinach Chicken Cheese Burger

I came across this #spinachburger on Pinterest and felt that the burger was quite peculiar in a way. I don't usually eat spinach in a burger. My mom cooks spinach in a soup form or stir-fry in a Asian-style as a side dish. But the picture that I saw was very tempting. It looks yummy and pretty easy to make so I decided to give it a try.
 
Spinach Chicken Cheese Burger
Ingredients:
100gm of butter
3 x cloves of garlic (chopped)
1 x onion (chopped)
1 x packet of oyster mushroom
1 x packet of spinach (without stems)
1 x red bell pepper (cut into cubes)
Light soya sauce
Oyster sauce
Salt
Black pepper (grounded)
Chicken parts, boneless (cut into small pieces)
Tomato (sliced)
Cheddar cheese slices
Hamburger buns
 
Instructions:
  1. Melt butter in a frying pan. Sautee mushroom for about 5 minutes.
  2. Add garlic and onion. Sautee again
  3. Add chicken and red pepper. Sautee till chicken is cooked.
  4. Add a little light soya sauce and oyster sauce.
  5. Add spinach. Finish off with salt and black pepper to taste. Place filling aside.
  6. Cut hamburger buns and slightly toast them in the oven.
  7. From bottom up, placed tomato slice, chicken filling and top it with cheese.
  8. Wrap the burger in foil. Place it in the oven 200 degrees celcius for about 20 minutes till the cheese melt. Enjoy.
Healthy Rating:
5/5. I used wholemeal buns and there are loads of goodness stuff in that burger.

Thursday, 9 October 2014

LEAH's Kitchen: Fried Macaroni (Macaroni Goreng)

I had unusual craving (what's new?) for macaroni, salivating at the thought of biting into those al-dente pasta and chew on the ground beef that is perfectly seasoned with some tomato-based sauce. Anyway, it has been a while since I whip up #friedmacaroni or #macaronigoreng and I had forgotten the recipe. That's the reason why I always jot down the recipe into this blog. I used my six sense (like real only!) and grab whatever I think will make the dish tasty.

Fried Macaroni or Macaroni Goreng (for 7-8pax)

Ingredients:
6 x cloves of garlic (chopped)
1 x big onion (chopped)
5 x chilli padi (optional)
2 x tbs of tomato paste
4 x tbs of chilli boh
2 x tbs of oyster sauce
2 x tbs of light soya sauce
100gm minced beef
500gm of macaroni
2 x cups of peeled shrimp
1/2 x can of button mushroom
3 x stalks of sawi
Salt
Ajinomoto
A little bit of water
 
Instructions:
  1. Boil a pot of water and cook macaroni till al-dente (follow packet instructions). Drain water and put cooked macaroni aside.
  2. In a small bowl, mix tomato paste, chilli boh, oyster sauce, light soya sauce and water till it's even. Put sauce mixture aside.
  3. Using frying wok, heat up some oil and stir-fry garlic, onion and chilli padi till fragrant.
  4. Add in the sauce mixture and minced beef. Stir-fry till beef is almost cooked and add shrimp and mushroom. Stir-fry again.
  5. Add in macaroni and stir-fry evenly.
  6. Add in sawi and stir-fry till vegetable soften.
  7. Add salt and ajinomoto to taste.
 

Wednesday, 17 September 2014

Small steps at a time...

When we said, "It's ok, take your time. We are not in a hurry to move-in to our new home", never did we realize our contractor will really take his own sweet time. Not that we mind now, but I'm just getting excited seeing the bits and pieces of work happening at our home right now. I wish I could see the end results, like now! Haha!

So far, the workmanship is not too bad. We faced several issues here and there but Alhamdullilah, they are easily resolved. As of today, our reno progress already have the kitchen carcass done up and I quite like the color. It was suppose to be different shades of pink but because the laminate material went obsolete, we had to make do with another color (I know right, blue is so off from the original pink). It turns out to be quite pretty (too soon to say huh?) right now. Hehe.

That's my dear husband :)
While I can't wait for this process to end, I'm quite tied down in terms of financial these past few months. The reno works has drained up all our savings and it will take some time for us to pick up the pace again. I'm quite grateful towards my parents who are kind enough to let us stay with them, and not rushing for us to move out. In fact, they are suggesting that we should stay with them and rent out our new house (quite typical huh?).

Speaking of dollars and cents, I really need to save up for my Bali trip this December (help!).

Hubby has been very supportive in terms of financial. I wish that I could do more for him and so I reciprocate by making him packed lunch, cooked for him dinner, and try my best to do the laundry for him. I'm so happy that he had completed his studies which could lead to a promising future for both of us. I'll be happy if he could just find another job which allows him to spend more time with me while bring home a decent paycheck.

I wish to earn side income and have some plans in starting a new business in the future. In the past, I've tried selling cosmetics, perfumes, and took up freelance designing jobs but none of them were long-term. However this time, I wish to make it long-term but I just can't decide between these two:
 
Food Business or Retail/ Tailoring Business
 
Help me pick? Or should I do both?
 
 
Of course these are just ideas at the moment. I will need to brush up my skills in these 2 areas and we shall see how to move ahead from there. Currently, I'm just testing market using Carousell app. LOL.
 
My latest tailoring project - The Bridesmaid

A customer that ordered Honey Cornflakes from me
 
 
Leah A A

Monday, 15 September 2014

LEAH's Kitchen: Lemak Sayur Pucuk Ubi (Tapioca Shoots in Hot Coconut Gravy)

Cravings can be quite monstrous for ladies, a deadly virus that can make us fat huh?

My sudden craving for #lemakpucukubi came out of nowhere and I wished I could have it there and then. It has been a long time since my Mom cook this very popular kampung-style dish. The dish is normally accompanied with fried fish, sambal belacan and fragrant rice - simple but yet satisfying meal. And of course, the spiciness of this dish makes it a number one favourite in my list :D
 
Lemak Sayur Pucuk Ubi (Tapioca Shoots in Hot Coconut Gravy)
 
Ingredients:
2 tie of pucuk ubi (tapioca shoots)
500ml of coconut cream (I used KARA brand)
Handful of anchovies (I bought $1 worth)
3 cloves of garlic
1 large onion
1 small piece of ginger
30 nos. of chilli padi
1 small piece of belacan
Salt
Ajinomoto
Water
 
Instructions:
  1. Remove stems from the tapioca shoots. We only need to use the leaves. Place the leaves in a boiling pot and add 4 teaspoon of salt. Using your hand, grind the leaves against these salt to soften the leaves' texture. When it's done, fill pot with water and boil the leaves for a few minutes till it soften (and also to remove the rubbery taste).
  2. Blend garlic, onion, ginger, anchovies, belacan and chilli padi till it form a liquid mixture.
  3. Drain the boiling water leaving the leaves in the pot. Pour the liquid mixture, coconut cream and water into the pot and start stirring the mixture. Adjust water level according to how thick you want the gravy to be.
  4. Boil the mixture till its cooked. Add salt and ajinomoto to taste.
My Healthy Rating:
This dish uses a lot of coconut cream (fattening down there!). Oh well, #yolo.
 

Tuesday, 9 September 2014

LEAH's Kitchen: Noodle Soup

I love soups! Especially those that I can modify with lots of chilli!

I didn't have time to upload the recipe for #noodlesoup and only realised today, after drooling at the pictures of food. I remember cooking this simple dish for the family on Mother's Day. It's so easy that you should try it! So here you go...

Noodle Soup
Ingredients:
Soup Base
1 pkt of anchovies (small to medium size)
3 cloves of garlic (mashed)
1 piece of ginger (sliced thinly)
Water
Salt
Pepper
 
Main items
500gm of prawn (half-peeled)
1 tie of kai choy or sawi
1 tie of Chinese celery or daun sop (for garnish)
1 pkt of fried shallots (for garnish)
1 pkt of Dodo fishball
Chilli padi
Sweet soya sauce or kicap manis
2kg of yellow noodle or bee hoon
 
Instructions:
  1. Using a large pot, boil water with anchovies, garlic and ginger. Seasoned the soup with salt and pepper
  2. Boil prawn, sawi and fishball separately. Put it aside for servings later
  3. Cook yellow noodle in hot water for a few seconds. Put it aside for servings later
  4. Blend chilli padi with a little water. Mix soya sauce into this mixture and put it aside for servings later.
  5. When everything is prepared, serve noodles with all the items prepared.
My Healthy Rating:
This should be quite healthy. Eat in moderation will do :)
 

LEAH's Kitchen: Stir-fry Broccoli with Chicken and Mushroom

Hubby keeps nagging me to cook for him some #broccoli for his post-workout meal. So yesterday after gym, I tried out this recipe to satisfy his cravings.

Stir-fry Broccoli with Chicken and Mushroom (6pax)
 
Ingredients:
4 stalks of broccoli
1 packet of oyster mushroom
200gm of boneless chicken (cut into pieces)
10 sticks of baby corn
4 tbs of oyster sauce
4 tbs of light soya sauce
2 ts of cornstarch (I used normal flour)
2 tbs of sesame oil
120ml of water
3 cloves of garlic (chopped)
1 large onion (chopped)
Small piece of ginger (sliced thinly)
Olive oil
Salt
Pepper
 
Instructions:
  1. Mix oyster sauce, light soya sauce, sesame oil and cornstarch. Put it aside for later.
  2. Using a small amount of olive oil, cook chicken for about 10 minutes in a wok or large frying pan.
  3. Pour in the broccoli, mushroom, babycorn, garlic, onion and ginger. Keep stirring till vegetable is medium cooked.
  4. Pour in the mixture (from no. 1) and water into the wok. Stir fry, season with salt and pepper and adjust taste accordingly.
My Healthy Rating:
Definitely healthy! Will give it 5/5. Yay!

Monday, 25 August 2014

LEAH's Kitchen: Roti Kirai or Roti Jala

#rotikirai or #rotijala, both meant the same thing - "net bread". When I saw that my mom had cooked beef curry last Saturday, I had a sudden craving for roti kirai. I knew there will be much left from the curry gravy for Sunday and thus, I took this opportunity to make roti kirai for the whole family.

I remember those times when my mom curse and swear while making roti kirai because she failed terribly. LOL. I thought it's going to be quite a challenge since it's going to be my first try but surprisingly, it was pretty easy in the end :)

Roti Kirai (20-30 pieces)
 
Ingredients:
2 3/4 cups of flour
1/2 x teaspoon of ground turmeric ("serbuk kunyit")
2 x cups of water
2 x cups of coconut milk
1 x teaspoon of salt
2 x eggs
*1 cup = 240ml/ 240gm
 
Essential Equipment:
Blender
Big frying pan
Roti jala mould
Credits: kellysiewcooks
Instructions:
  1. Mix all ingredients and ensure smooth batter. Once the mixture is evenly mixed, blend the mixture to ensure even smoother batter (this is important to ensure that the batter flows out smoothly from the mould).
  2. Scoop mixture using the mould and see if the batter flows out smoothly.
  3. Heat frying pan and brush oil on it. Use roti kirai mould to scoop mixture and start pouring the mixture onto frying pan into circular motion (don't need to pour so much!)
  4. Cook about 20-30 seconds (lightly crisp) and start folding the roti kirai into half, and half again to make a triangle.
  5. Serve with curry or sambal.
 
My Healthy Rating:
Not applicable. Haha, this is too yummy to think about calories :)
 

Tuesday, 12 August 2014

LEAH's Kitchen: Grilled Salmon served with Caprese Salad

I was craving for #caprese salad as I browse through the photos taken during my trip to Europe. I gave that idea to Mr. Husband if he wants that as a meal and he frowned, "No meat?"

Seriously? What a carnivore! LOL. Ok, Mr. Husband. You asked for it, you will get it :)

The caprese salad is pretty heavy on its own and hence, I decided on fish as the main "meat", and decided on #grilledsalmon for this meal...

Grilled Salmon with Lemon Butter Sauce served with Italian Caprese Salad
Ingredients:
200gm of salmon fillet
2 x tomatoes (sliced)
1 x lemon (freshly squeezed)
1 x garlic (finely chopped)
Fresh basil leaves
Butter
Grounded black pepper
Sugar
Salt
Mozzarella cheese (sliced)
Olive Oil
Balsamic vinegar
 
Instructions:
Grilled Salmon
  1. To make the sauce, melt butter in a sauce pan and add a small amount of lemon to taste, garlic, sugar and pepper. If you are using unsalted butter, add a little bit of salt. For a creamier sauce, you can add fresh cream to make the sauce thicker.
  2. Season salmon with generous serving of pepper and salt, and a little amount of olive oil. On a frying pan, spread olive oil just enough to grill the salmon. Cook salmon at all side till it turn golden brown.
  3. Plate the cooked salmon and pour the lemon butter sauce on it. Sprinkle pepper and basil leaves as garnish
Caprese Salad
  1. Plate the tomatoes, with cheese and basil leaves.
  2. Pour a little of olive oil and balsamic vinegar
My Healthy Rating:
The fattening stuff we have here is the mozzarella cheese.
Hence, eat in moderation and I'm sure you will be fine :)

LEAH's Kitchen: Chicken Wrap with Sweet Corn

Hubby told me that he was going to the gym. As a good wifey (ehem! self-praise here), I had decided to whip up something healthy for his post-workout meal and motivate him to stick to a healthy eating regime. I recalled those times in Australia where I made #chickenwrap lunches during our stay in the apartment.

Without searching for any recipe, I decided to explore mixing my own ingredients for the wrap filling, with whatever I can find in the supermarket...

Chicken Wrap & Sweet Corn
 
 
Ingredients:
Boneless chicken breast (or any chicken parts) - cut into small pieces
2 x tomatoes (diced)
1 x bell pepper (diced)
1 x onion (sliced)
1 x sweet corn (cut into 3 pieces)
Tortilla wraps
Oyster sauce
Dried basil leaves
Grounded Black Pepper
Salt
Butter (small amount)
 
Instructions:
Sweet Corn
  1. Heat water in a pot and add sugar. When the water starts boiling, add sweet corn and boil for about 8-10minutes. You can use a fork to poke onto the corn and see if it glides down easily. If it is, means, the corn is cooked.
  2. Melt butter and sprinkle some pepper and dried basil leaves. Using tongs, place the corn into the mixture and briefly lather it with the butter mixture.
Chicken Filling
  1. Pour olive oil into a frying pan. Cook chicken until it is half-cooked, remove from pan and put it aside.
  2. Using the same pan, cook onions and bell pepper till fragrant. Add chicken and tomatoes and stir fry till the vegetables turn soft and puree is formed.
  3. Add in oyster sauce, pepper, and salt to taste. Stir fry till mixture is cooked.
  4. Heat tortilla wrap in a microwave for 30 seconds. Put a small amount of chicken filling and wrap it. There you have it!
My Healthy Rating:
Definitely a healthy choice of meal. Great idea if you want to have something light yet fulfilling to the stomach.


Thursday, 31 July 2014

LEAH's Kitchen: Fried Crabsticks

This was an impromptu idea. I came across this snack few months back in one of the FB group that I was following, and these crabsticks pictures were floating around during the CNY period. So when I was shopping for the honey cornflakes ingredients and saw the packets of Dodo crabsticks, I thought to myself "Hey, why not we have these for New Year?". Little did I know that making these #friedcrabsticks will suck out all our effort and perseverance.

Again, I use my helper (sweet hubby) to assist me with peeling those crabstick skin. Imagine, in each packet there are 12 sticks, cut into 2 pieces, multiply by 5 packets. We peeled 120 individual crabsticks into approx. 1cm flat pieces. Gawd!

Fried Crabsticks
 
Ingredients:
5 x packets of Dodo crabstick
Cooking Oil
Paper Towel
 
Instructions:
1. Cut all crabsticks into half.
2. Peel crabstick skin into approx. 1cm width and place it on a tray.
3. While at it, deep fry those skins which have already been air-dried till golden brown and crispy.
4. Place fried crabsticks on clean paper towel to absorb the oil.
5. Store in air-tight container after crabsticks have cooled down.
 
 
My Healthy Rating:
These crabsticks are made of flour, which technically means carbohydrate. Definitely not a healthy type of snack for those who are self-conscious.


LEAH's Kitchen: Honey Cornflakes

I was contemplating if I should bake Hari Raya (HR) #goodies this year because I was so caught up with sewing my HR costume. But when my sister started baking 5 type of goodies and filled the kitchen with fresh bakery smell, I suddenly got into the mood.

Every year, I have been baking honey cornflakes and oat biscuits. Yes, I only choose the simplest recipe as the oven that we have is not really advanced or meant for baking complicated items. I had thought of baking "tapak kuda", a type of nutella roll, but I guess I will put that plan into place for next year once I move into my new house.

Since it's soooo last minute, I had my husband to helped me out in making this #honeycornflakes. So sweet isn't he?

Honey Cornflakes
 
Ingredients:
1 x box of cornflakes - 220gm
100gm butter
6 x tablespoon honey
3 x tablespoon sugar
Papercups
Coloured sugared balls (for decoration)


Instructions:
1. In a heated pot, melt butter and mix with sugar and honey. Stir till mixture is even.
2. Pour in cornflakes and stir till mixture is evenly spread out to the cornflakes.
3. Placed a good amount of evenly mixed cornflakes into papercups.
4. Sprinkle coloured sugared balls on each cups as décor.
5. Baked the honey cornflakes for 10 minutes at 150 celcius.
 
 
My Healthy Rating:
No such thing. LOL.


Wednesday, 14 May 2014

LEAH's Kitchen: Spaghetti Prawn Aglio Olio

Yummeh!

The only pasta that I can make it super spicy to satisfy my tastebuds. I was craving badly for aglio olio from #SPIZE simpang bedok since last Saturday however, my hubby was too tired to bring me to SPIZE since he was working the following day. All night, I kept drooling at videos of #aglioolio and on Monday, we went to #Pastamania to satisfy my cravings.

However, I wasn't satisfied. Period.

You know the feeling when something just doesn't satisfy you? You will keep thinking and thinking about it non-stop. And yes, it happened to me. Hence, I decided to whipped up my own aglio olio with the balance prawns I had in the freezer yesterday. And oh boy, I am glad I did that. I finally got my favourite #pasta down my hungry belly!

Spaghetti Prawn Aglio Olio (4 pax)
 
Ingredients:
15 x Garlic (chopped)
3 x Italian Parsley stalk (chopped)
8 x Chilli padi (sliced)
1 x tablespoon of grounded black pepper
500gm fresh prawns
1 x packet of Spaghetti
Extra Virgin Olive Oil
Salt
 
 
Instructions:
1. Cook pasta according to packaging instructions. Drain water and put pasta aside.
2. Pour substantial amount of olive oil into frying pan. Cook garlic until fragrant
3. Pour in Chilli Padi, Black Pepper and Parsley and stir-fry.
4. Add in prawns and cook till prawn turns orange.
5. Add in pasta and stir-fry till the dish is mixed well.
6. Add salt to taste.
7. Using tongs, served pasta and garnish with parsley flakes.
 
My Healthy Rating:
This dish tends to be high with oil content (Aglio Olio simply meant Oil and Garlic). Fret not, I heard that olive oil is good for a human body. Hence, I rate this dish to be 3/5.


Monday, 28 April 2014

LEAH's Kitchen: Black Pepper Prawn

One of our friend hosted a #potluck session at her new house last week. And since I had to come up with a dish for the gathering, I decided to give it a go for #blackpepperprawn. I've always loved the way my mom did her black pepper dishes but I decided that I shall venture into my own recipe without asking her for the recipe, grabbing some tips here and there from the internet :D
 
Feeling like a "Kiasu-aunty", I was so happy when I saw Sheng Siong was having a promotion for prawns, at only $14.90 per kg! Perfecto...! So I bought 2 kg, to cook for my friends, as well as for my own family. Oh, and I did a "bimbotic" act in the supermarket, refusing to touch the prawns with my own bare hands and getting the staff to select and weigh the prawns for me! LOL.
 
 
Black Pepper Prawns (15-20 pax)
 
Ingredients:
20 x Garlic (chopped)
2 x Onion (chopped)
A small bit of Ginger (sliced thinly)
4 x Chilli padi (smashed)
2kg fresh prawns
2 bottle of Black Pepper Sauce (Wohup brand)
Oyster Sauce
Grounded Black Pepper
Curry Leaves
Water
Salt
Ajinomoto
 
Instructions:
1. Pour oil into a cooking wok and start frying garlic, onion, ginger and chilli padi till fragrance.
2. Pour in the black pepper sauce and water (do not pour in too much. The amount depends on how watery or how thick you want the dish to be.)
3. Add oyster sauce, prawns and black pepper. Stir-fry the dish regularly.
4. Add in curry leaves, salt and ajinomoto to taste. Mixed dish until prawn is cooked (turns orange).
 
My Healthy Rating:
Prawn is high in cholesterol so I wouldn't rate this dish as healthy.
Those with health problems should eat it in moderation.


Monday, 21 April 2014

LEAH's Kitchen: Stir-Fried Basil Beef

#Basilchicken has always been one of my favourite Thai dish. And when one of my friend told me she knew how to cook that dish, I was delighted! Of course, I would ask her for the recipe and try cooking it on my own ;p Why not since I can drown myself by eating a whole plate of Basil Chicken be it 100gm, 200gm or 300gm and it will still much cheaper compare to when you order from hawker stall. Heh.

I have tried cooking Basil chicken before and it was delicious ^self-praise^ huhu... I did a little twist this time round by swapping the protein from chicken to beef since I had some leftover minced beef from the previous cooking tryst (Fried Tom Yum Macaroni, will share this recipe soon!). Yup, so I made a full good use of the frozen minced beef and cooked #basilbeef for my husband.

Oh yes, I need to complain. I really hate defrosting meat. It takes forever to defrost. Bleah.

Thai Basil Beef (3 pax)
 
 
Ingredients:
1 x Onion (chopped)
4 x Garlic (chopped)
5 x Chilli Padi (varies, depends on the level of spiciness that you want)
250gm minced beef (can substitute for chicken)
Thai Fish Sauce
Light Soya Sauce
Sweet Soya Sauce (Kicap Manis)
Basil Leaves (just the leaves)
Salt
Pepper
 
Instructions:
1. Using vegetable oil, stir fry onions, garlic and chilli padi in your wok. Fry till fragrance.
2. Add light soya sauce, thai fish sauce and sweet soya sauce. Add minced beef and stir fry the beef till the meat is 90% cooked.
3. Add basil leaves and stir-fry till the leaves soften.
4. Add salt and pepper to taste.
 
My Healthy Rating:
This dish can be pretty salty since Thai Fish Sauce is being used here. Hence, watch out for the saltiness level when you add the sauces and salt to this dish.
This dish is best served with fragrance rich and sunny side up egg (malay call it "mata lembu"). Overall, I would say that the dish is a good source of protein if you cut down on the carbohydrate intake :)

Tuesday, 15 April 2014

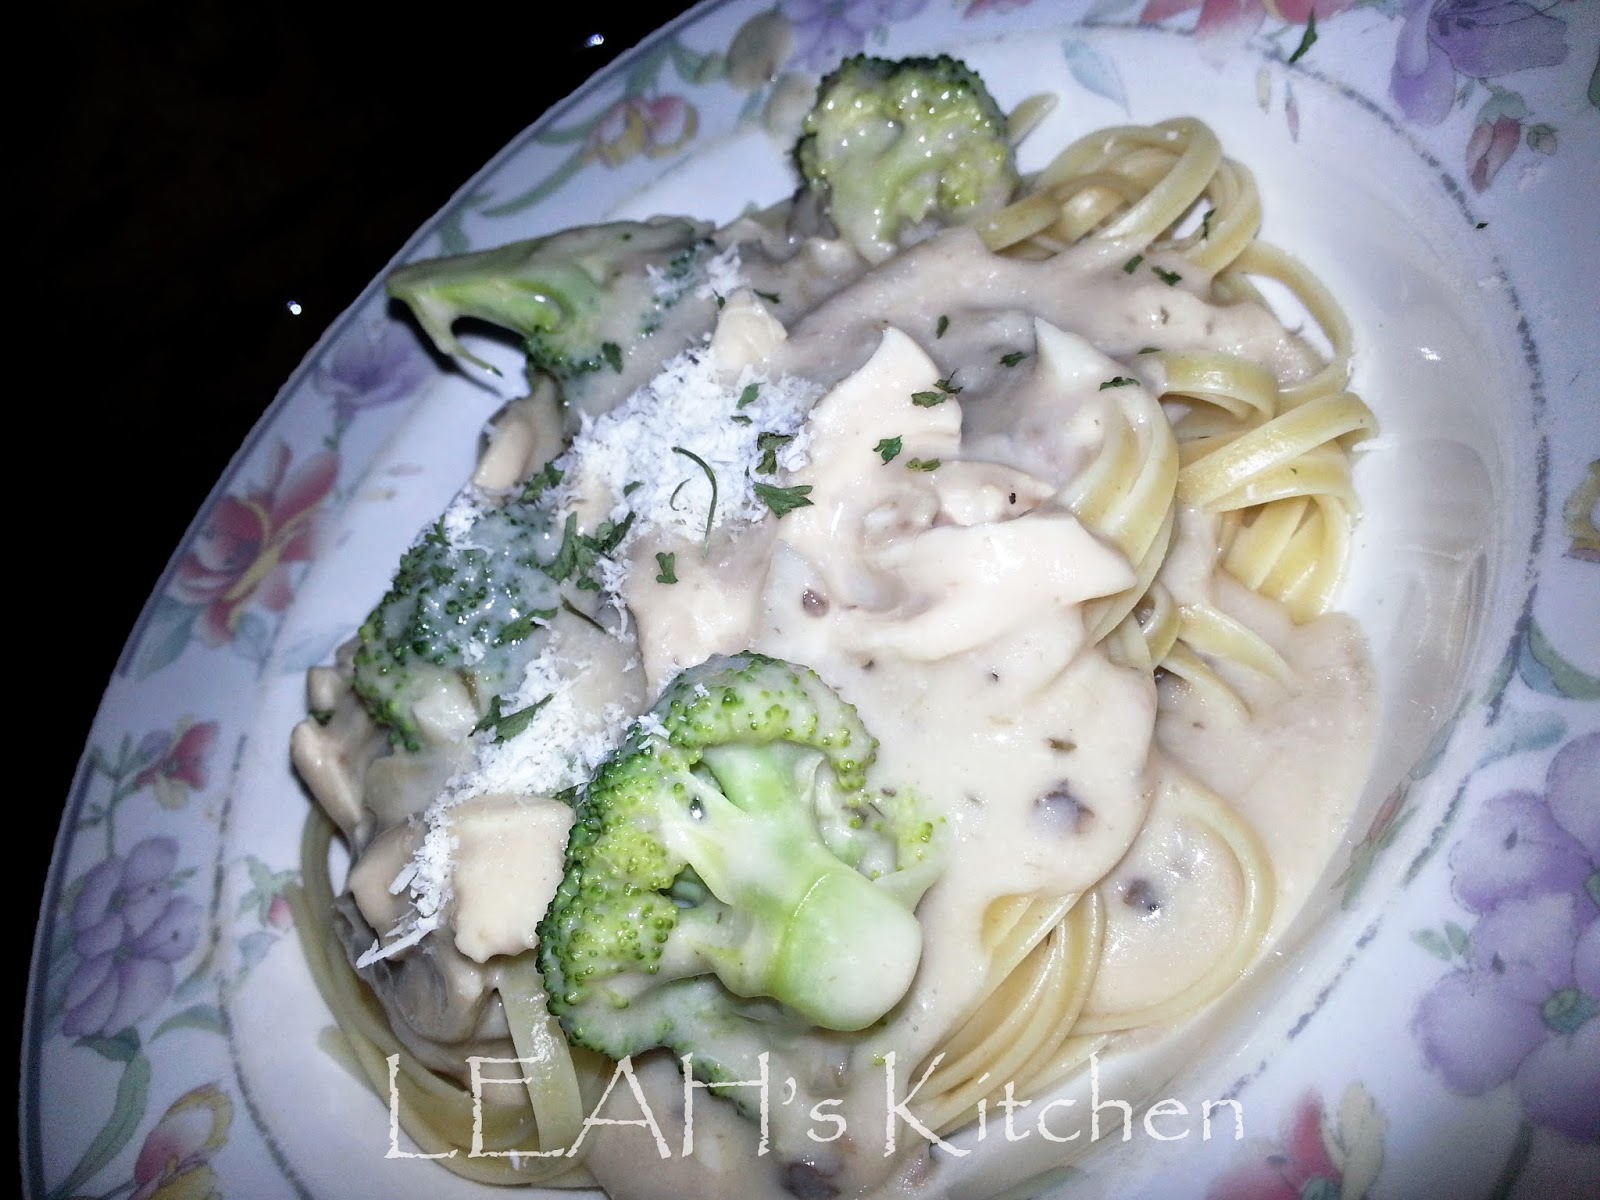
LEAH's Kitchen: Creamy Chicken Pasta

My hubby had a craving for a creamy pasta and so I started googling for recipes to whip up something delicious. And I found something simple and fast to cook... #creamychicken ! A creamy pasta is not something that I fancy though but the thought of making it was enough to make me salivate. Recalling that my cousin used to use Campbell soup in her creamy pasta, I make it a point to include that in my recipe as well.
 
Creamy Chicken Pasta (3-4 pax)
 
  
Ingredients:
1 x Onion (chopped)
1 x Garlic (chopped)
Chicken Breast (cooked, shredded)
Chicken stock
Broccoli
1 can of Campbell Cream of Mushroom
Linguine pasta (depends on your pasta choice)
Low fat milk
Grated Parmesan Cheese
Parsley flakes
Salt
Pepper
 
Instructions:
 1. Cook pasta according to packaging instruction until pasta is al dente. Drain water and place pasta in a serving plate.
2. In a saucepan, cook onion and garlic in olive oil till the onion turns translucent.
3. Pour in the Campbell soup, milk and chicken stock. Regularly stir so that the sauce doesn't stick to the sides of the saucepan
4. Add in chicken and broccoli.
5. Stir until cook. Add salt and pepper to taste.
6. Pour the sauce over the pasta on serving plate.
7. Garnish with grated cheese and parsley flakes
 
My Healthy Rating:
Since the dish is high in carbo, I would rate the healthiness as 3/5.
To make it a healthy dish, try using a wholemeal pasta instead of the normal ones and use low fat milk.